

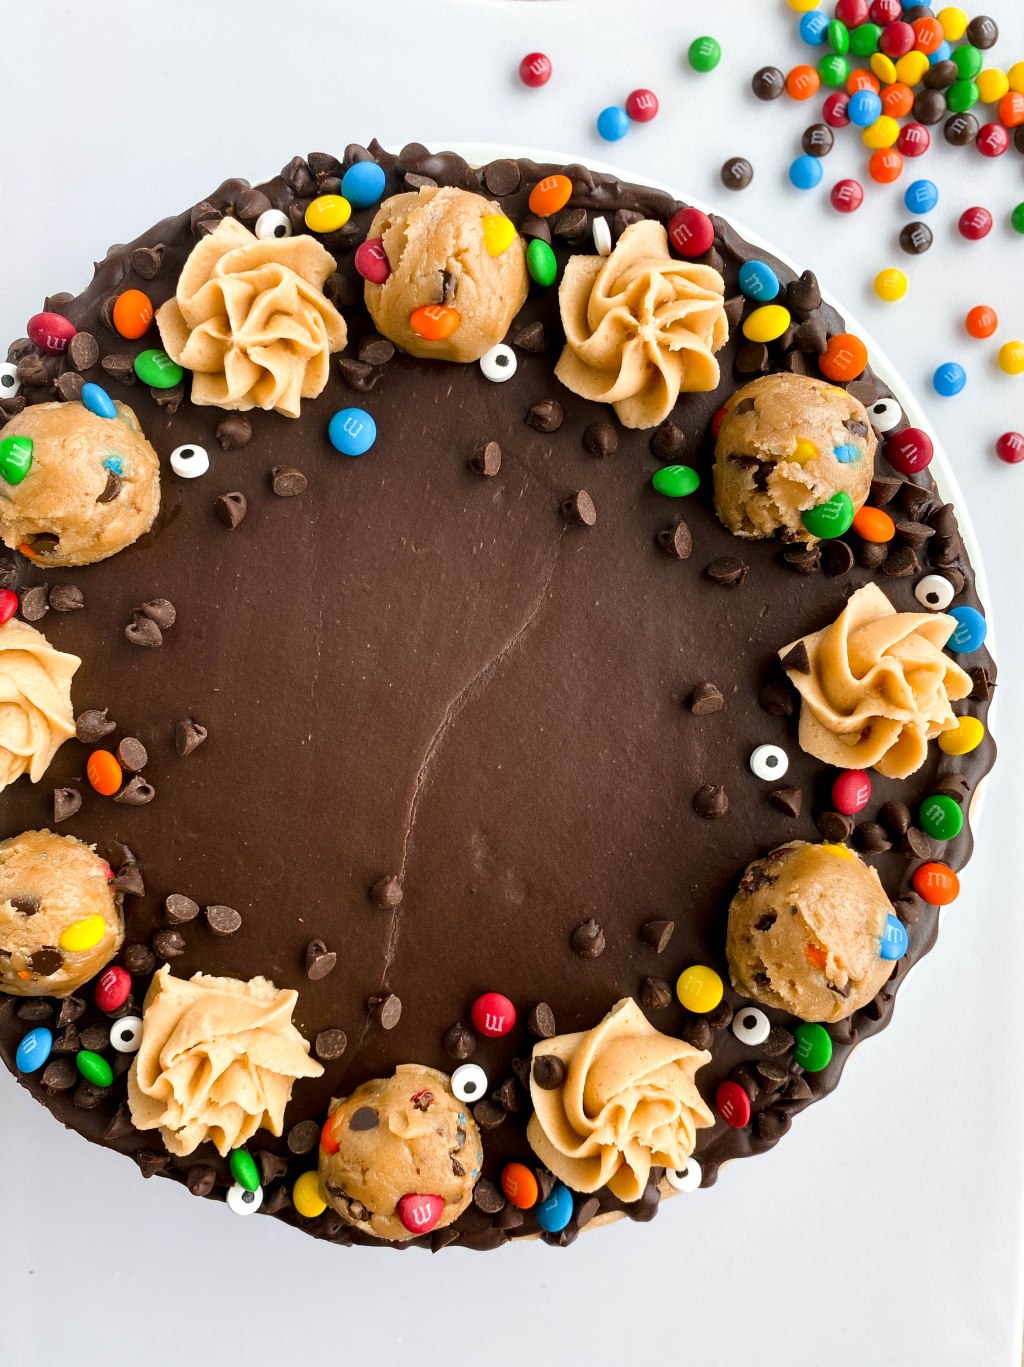
Chocolate Peanut Butter Cup Layered Cake
A rich chocolate cake layered with a sweet peanut buttercream and finished with a chocolate ganache on top. Each bite is reminiscent of the classic peanut butter cup chocolates.
Yields
12 Slices
Prep Time
1 Hour 30 Minutes
Cook Time
30 Minutes
Total Time
2 Hours
Ingredients
- Chocolate Cake
- 1 and 3/4 cups cake flour
- 3/4 cup cocoa powder (Dutch-processed preferred)
- 2 teaspoons baking powder
- 1 teaspoon salt
- 3/4 cup unsalted butter, room temperature
- 1 and 3/4 cups granulated sugar
- 4 large eggs, room temperature
- 3/4 cup milk, room temperature
- Peanut Butter Buttercream
- 1 and 1/2 cups creamy peanut butter
- 1 cup unsalted butter (slightly cooler than room temperature)
- 6 cups powdered sugar
- 1/2 cup heavy cream
- Chocolate Ganache
- 1 and 1/2 cups chocolate chips
- 3/4 cups heavy cream
- Optional For Decorating
- mini chocolate chips
- mini peanut butter cups
Instructions
- To make Chocolate Cake, begin by preheating the oven to 350°F. Trace and cut out parchment paper to line the bottom of two 8 inch cake pans. Set aside.
- In a large bowl, use a mixer to cream butter for 2 minutes until light and fluffy. Add in granulated sugar and mix for 3 to 4 minutes until creamy. Add in eggs, one at a time, incorporating after each addition. Set aside.
- In a separate bowl, whisk together flour, cocoa powder, baking powder, and salt.
- Starting with your dry ingredient mixture, begin alternating additions of the dry ingredients and the milk to the large mixing bowl. You should begin by adding 1/3 of your dry ingredient mixture and follow by adding 1/2 of the milk. Repeat, mixing after each addition until just incorporated.
- Divide the batter equally between each of the lined cake pans. Bake in the oven for 25-35 minutes, until the edges are golden and the middle is set.
- Remove the cakes from the pans to let cool completely.
- To make Peanut Butter Buttercream, use a mixer to beat butter until light and fluffy. Add in peanut butter and mix until incorporated. Gradually begin to add in the powdered sugar while continuing to mix.
- Stream in half of your heavy cream. If the buttercream appears to thick to spread, add in the remaining half of the heavy cream.
- To make Chocolate Ganache, begin by heating the heavy cream on the stovetop or in the microwave until hot and steaming, just before it boils. Pour the heavy cream over the top of the chocolate chips in a bowl. Let this sit for 4 minutes.
- Begin stirring from the center of the bowl. The chocolate chips should melt and form a smooth chocolate ganache. Set this aside for assembly.
Cake Assembly
- Level your cakes with a serrated knife to create flat, even layers that will be easy to stack.
- To a cake stand or large plate, spread a thin layer of peanut butter buttercream. This will help keep the cake in place while you frost and decorate it.
- Place one of the cake layers onto the stand. Spread a 1/2 inch thick layer of buttercream evenly across the cake.
- Use about 1/2 cup of chocolate ganache and spread an even layer across the top of the buttercream.
- Place the other cake layer on top, flipping this layer upside down so that the top of your cake has a flat bottom.
- Cover the entire cake with a thin layer of buttercream to create a crumb coat, smoothing out the sides as much as possible. Chill the cake for 20 minutes before using the remaining buttercream to cover and frost the cake again.
- Use the remainder of the chocolate ganache to spread an even layer over the top of the cake.
- To decorate, add the remaining buttercream to a pastry bag and pipe designs around the top of the cake. Use mini chocolate chips and place mini peanut butter cups around the top of the cake.
- This cake is best enjoyed the day it is made. Store in an airtight container if leftovers remain.


Leave a comment