Soft and Gooey S’mores Stuffed Cookies

Serves 10 Large Cookies or 20 Regular Cookies

Total Time 1 Hour 30 Minutes

Ingredients

  • 1 cup unsalted butter, room temperature
  • 1 cup light brown sugar, packed
  • 1 / 2 cup granulated sugar
  • 2 eggs
  • 1 teaspoon vanilla extract
  • 2 3/4 cups all-purpose flour
  • 1 teaspoon baking soda
  • 1 teaspoon salt
  • 6 graham crackers, full sheets
  • 1 1/2 cup chocolate chunks or chips, semi-sweet or dark
  • 10 – 20 marshmallows, standard size

Preparation

Preheat oven to 375 degrees Fahrenheit. Line two large baking sheets with parchment paper. Set aside.

In a large mixing bowl, use a mixer to cream together butter, brown sugar and granulated sugar (approximately 3-4 minutes, scraping the sides of the bowl and beater after the first 2 minutes). Add in the eggs one at a time, mixing to incorporate after each addition. Add in vanilla extract and mix. Set aside bowl.

In a medium mixing bowl, whisk together all-purpose flour, baking soda and salt. Using a food processor or high speed blender, finely pulse/crush the 6 graham cracker sheets. You may also add the graham crackers to a ziploc bag and use a rolling pin for this step instead. Make sure that no large pieces remain and that the mixture is only fine crumbs. You may use a fine mesh strainer to ensure this. Add the graham cracker crumbs to the dry ingredient mixture and combine.

Add your dry ingredients to the other large mixing bowl. Stir to combine or use the paddle attachment on your mixer. It should come together as a thick dough. Pour in the chocolate chunks and combine.

Use a 1 / 2 cup measuring cup to form dough into 10 large dough portions. If you would prefer regular size cookies use a 1 / 4 cup measuring cup and form 20 dough portions. Place dough onto your parchment lined baking sheets, leaving at least 2 inches in between each cookie.

Use the palm of your hand to slighty flatten the dough balls. Take one standard marshamllow and place in the center of each dough ball. Carefully fold the dough around the marshamllow so that you can no longer see the marshmallow. Place the dough ball seam side down on the baking sheet. Do this for each cookie.

Cover the baking sheets with either plastic wrap or aluminum foil and place into the refrigerator to chill for 30 minutes. Do not skip this step. Not properly chilling the dough will result in oily cookies that have spread too much.

Bake for 10-11 minutes for large sized cookies or 9-10 minutes for smaller sized cookies. A lighter colored baking sheet will likely require the longer bake time while a darker colored baking sheet will likely require the shorter bake time. Remove from the oven when the bottoms appear to be golden brown but the middle still appears very soft. The cookies need to be left to completely cool and set up on the baking sheet for at least 10-15 minutes before removing.

Store in a closed container for up to three days. Enjoy!

The Most Outrageous Oreo Layered Cake

Serves 12 Slices (Approximately)

Total Time 2 Hours

Ingredients

  • Oreo Infused Milk
    • 1 cup milk
    • 8 oreo cookies (standard size)
  • Oreo Cake
    • 2 1/2 cups cake flour (substitute all-purpose flour)
    • 2 teaspoons baking powder
    • 1 / 2 teaspoon salt
    • 3 / 4 cup unsalted butter, room temperature
    • 1 1/2 cups granulated sugar
    • 3 eggs, room temperature
    • 2 teaspoons vanilla extract
    • 3 / 4 cup of the oreo infused milk, room temperature
    • 12 oreo cookies (standard size)
  • Oreo Cream Cheese Filling
    • 36 oreos (equal to a standard 14 oz package)
    • 8 oz cream cheese
  • Vanilla Cream Cheese Frosting
    • 16 oz (2 standard sized packs) cream cheese, room temperature
    • 1 cup unsalted butter, slightly cooler than room temperature
    • 8 cups powdered sugar
    • 1 teaspoon vanilla extract
    • pinch of salt
  • For Decorating (Optional)
    • 1 / 2 cup chocolate chips
    • 2 tablespoons milk
    • Oreo cookies

Preparation

Oreo Infused Milk

Add one cup of milk and 8 oreos to a bowl. Use a spoon and gently stir together, completely covering the oreos with the milk. Let sit for 10 minutes.

Strain this mixture through a fine mesh strainer and set aside to use as directed in the recipe.

Oreo Cake

Preheat oven to 350 degrees. Trace and cut out parchment paper to line the bottoms of two 8 – inch cake pans. Set aside.

In a large mixing bowl, use a mixer to cream butter for 2 minutes until light in color and fluffy. Add granulated sugar and mix for approximately 3-4 minutes or until creamy. Add in eggs, one at a time, incorporating after each addition. Add in vanilla extract. Set aside.

In a medium mixing bowl, whisk together cake flour, baking powder and salt.

Starting with your dry ingredient mixture, begin alternating additions of dry ingredients and 3/4 cup of oreo milk to the large mixing bowl. You should begin by adding 1/3 of your dry ingredient mixture and follow by adding 1/2 of your milk. Repeat these additions, mixing after each until just incorporated. Avoid over mixing as this will cause the cake to become dry once baked.

Use a sharp knife or a rolling pin to break 12 oreos into small pieces. Do not finely crush the oreos. Carefully fold the oreo pieces into your batter until just incorporated.

Divide the cake batter equally between each of your cake pans. Place in the oven and bake for 25-35 minutes (a dark cake pan will requirer the shorter cook time while a lighter colored cake pan will require the longer cook time) or until an inserted toothpick comes out clean.

Remove the cakes from the cake pans and place on a wire rack to let cool completely.

Oreo Cream Cheese Filling

While the cakes are cooling, prepare the oreo cream cheese filling. Add 36 oreos to a high speed blender or food processor. Pulse until the oreos resemble a fine crumb and no large pieces remain. Add in the cream cheese and pulse/blend again until fully incorporated.

Using an additional cake pan lined with foil or plastic wrap, spread the oreo filling in an even layer. Place in the refrigerator to chill while you prepare the frosting. (Note: This is the same method used in my chocolate chip cookie dough cake recipe)

Vanilla Cream Cheese Frosting

In a large mixing bowl or in a standard mixer, beat the cream cheese and butter until light and fluffy (approximately 2 minutes). Add in vanilla extract and a pinch of salt. Gradually begin to add in powdered sugar and continue to mix. If the frosting appears too thick to spread, add in a tablespoon of milk at a time until desired consistency is reached.

Cake Assembly

Level your cooled cakes with a serrated knife.

To a cake stand or large plate, spread a thin layer of your cream cheese frosting.

Place one of the cake layers onto the stand. Spread a layer of cream cheese frosting about 1/4 inch thick.

Remove the oreo filling layer from the refrigerator and carefully take the layer out of the pan. Place this layer onto your cream cheese frosting on your cake. Lightly press down.

Spread an additional 1/4 inch layer of cream cheese frosting

Place your other cake layer on top, flipping this cake layer upside down so that the top of your cake has a flat bottom. Press down gently.

Cover the entire cake with a thin layer of frosting. Smooth out the sides as much as possible. This will be your crumb coat. Chill the cake for 15-20 minutes before using the remaining frosting to completely cover and frost the cake.

(Optional: chocolate topping) In a small microwavable bowl, combine chocolate chips with milk. Microwave in 20 second intervals, stirring after each interval, until the chocolate is completely melted and smooth. The consistency of the chocolate should be pourable. Add in black food coloring until desired color is achieved. Use a spoon to create large puddles around the top of the cake (as shown in the photo) and some drips down the sides of the cake. Before the chocolate hardens, use remaining cream cheese frosting to create dollops around the edge of the cake and press in oreo cookies as decoration.

Let the chocolate completely set before slicing. This cake should serve approximately 12 people. Enjoy!

Note: Cake is best enjoyed the day it is made. Store in an air-tight container if leftovers remain.

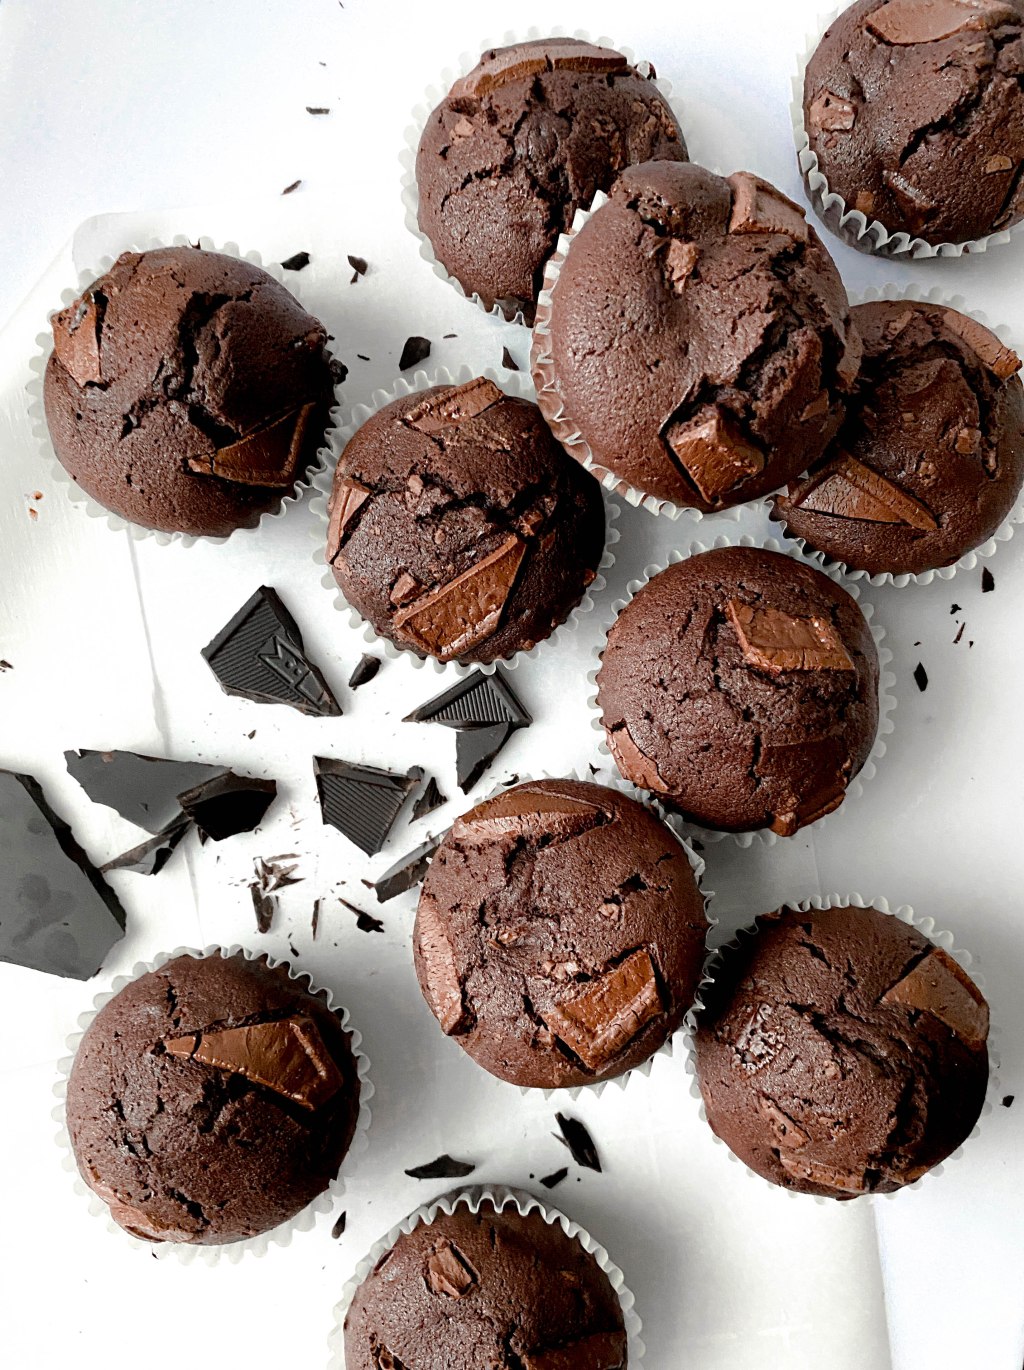
Double Dark Chocolate Chunk Muffins

Serves 12 Muffins

Total Time Less Than One Hour

Ingredients

  • 1 1/2 cups all-purpose flour
  • 1 / 2 cup cocoa powder (I use Dutch-processed)
  • 1 cup light brown sugar, packed
  • 1 teaspoon baking powder
  • 1 teaspoon salt
  • 1 / 2 teaspoon espresso powder (optional, to enhance chocolate flavor)
  • 1 / 2 cup whole milk, room temperature
  • 2 eggs, room temperature
  • 1 / 2 cup (1 stick) unsalted butter, melted
  • 1 1/2 cup dark chocolate chunks

Preparation

Preheat oven to 350 degrees Fahrenheit. Fill a standard muffin tin with 12 liners. Set aside.

In a large mixing bowl, combine the all-purpose flour, cocoa powder, brown sugar, baking powder, salt and espresso powder (optional). Whisk together and make sure no clumps remain.

In a separate mixing bowl, whisk together the milk and eggs. It is important that your milk and eggs are room temperature or you will have a curdled batter when combining with the melted butter in the next step.

Add the milk-egg mixture to your dry ingredients along with your melted butter. Stir until just combined. Pour in the chocolate chunks, reserving some to top your muffins with, and stir again.

Divide the batter evenly between the muffin liners. Top with the remaining chocolate chunks. Place into the oven and bake for 20-25 minutes, or until an inserted toothpick comes out clean.

Enjoy while warm! These are best consumed the day they are made but may be stored in a closed container and warmed up again before eating.

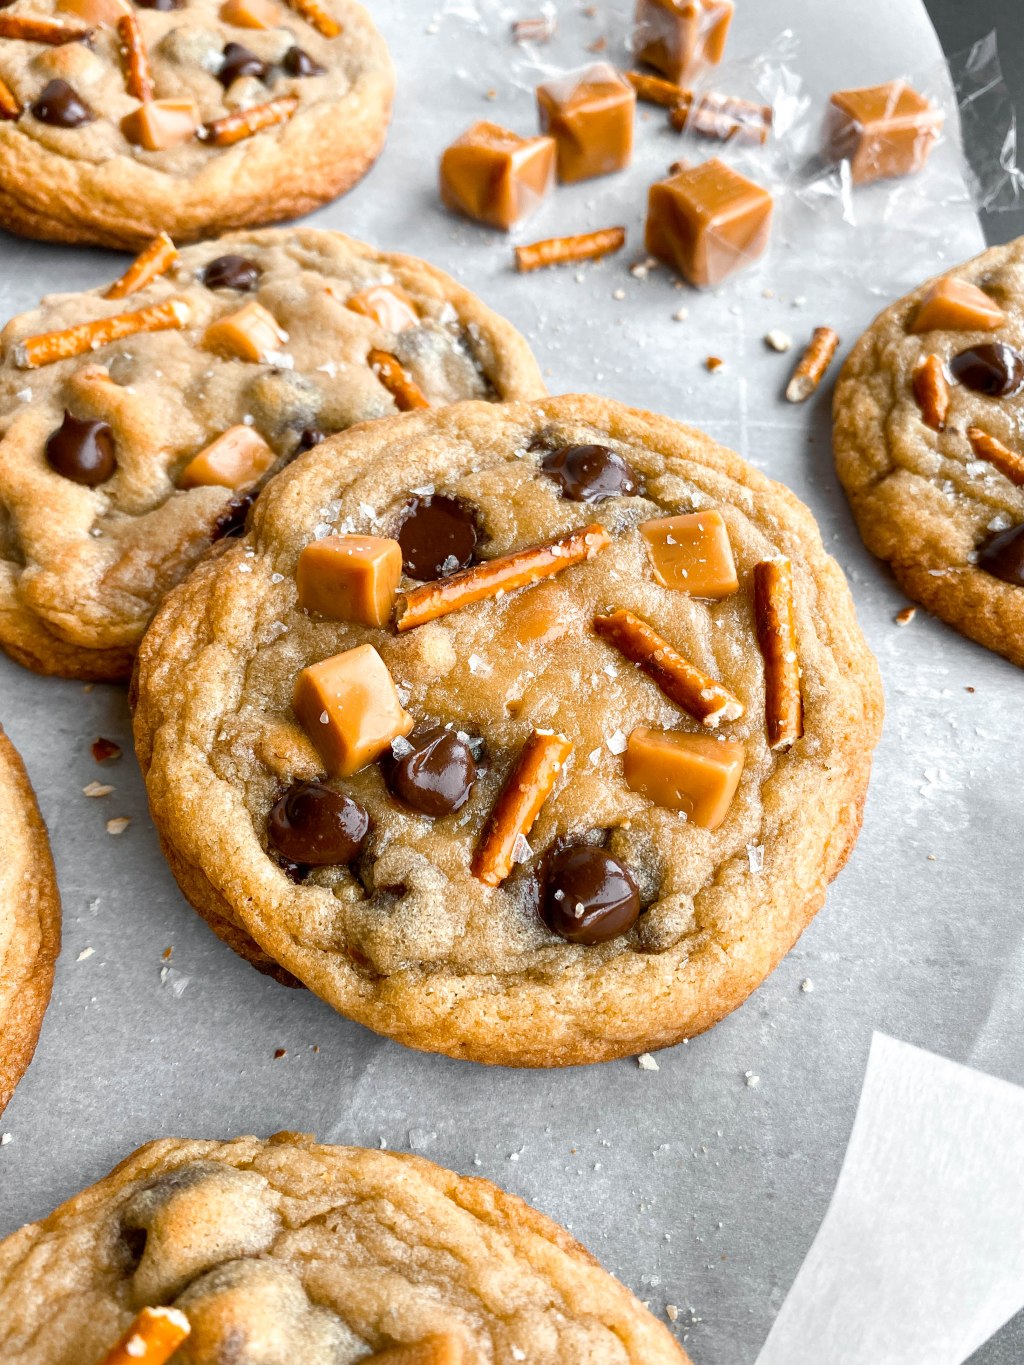
Extremely Thick and Chewy Kitchen Sink Cookies

Serves 10 Large Cookies or 20 Regular Cookies

Total Time One Hour

Ingredients

  • 1 cup unsalted butter, room temperature
  • 1 cup light brown sugar, packed
  • 1 / 2 cup granulated sugar
  • 2 eggs
  • 1 teaspoon vanilla extract
  • 3 cups all-purpose flour
  • 1 teaspoon baking soda
  • 1 teaspoon salt
  • 1 1/4 cup chocolate chips (semi-sweet or dark)
  • 3 / 4 cup or 16 unwrapped caramel candies, cut into 1/4″ pieces
  • 1 / 2 cup pretzels, broken into small pieces

Preparation

Preheat oven to 375 degrees Fahrenheit. Line two large baking sheets with parchment paper. Set aside.

In a stand mixer or large mixing bowl, cream the butter, brown sugar and granulated sugar (approximately 3-4 minutes, scraping the sides of the bowl and beater after the first 2 minutes). Add in the eggs one at a time, mixing to incorporate after each addition. Add in vanilla extract and mix. Set aside bowl.

In a medium mixing bowl, whisk together all-purpose flour, baking soda and salt. Add this dry ingredient mixture to the other large mixing bowl. Stir to combine or use the paddle attachment on your mixer. It should come together as a thick dough. Pour in the chocolate chips, caramel candies and pretzels and combine.

Place the dough into the refrigerator to chill for 30 minutes. Do not skip this step. Not properly chilling the dough will result in over spreading and oily cookies.

Use a 1 / 2 cup measuring cup to form dough into 10 large dough portions. If you would prefer regular sized cookies, use a 1 / 4 cup measuring cup and form 20 dough portions. Place dough onto your parchment lined baking sheets, leaving at least 2 inches in between each cookie.

Bake for 10-12 minutes for large sized cookies or 9-11 minutes for smaller sized cookies. A lighter colored baking sheet will likely require the longer bake time while a darker colored baking sheet will likely require the shorter bake time. Remove from the oven when the bottoms appear to be golden brown but the middle still appears soft. Let the cookies completely cool and set up on the baking sheet for at least 10 minutes.

These are best consumed the day they are made! Note that the pretzels will soften and lose their crunch with time.

Enjoy!

Chocolate Peanut Butter Cup Layered Cake

Serves 12 Slices (Approximately)

Total Time 2 Hours

Ingredients

  • Chocolate Cake
    • 1 3/4 cups cake flour (substitute all-purpose flour)
    • 3 / 4 cup cocoa powder (Dutch-processed preferred)
    • 2 teaspoons baking powder
    • 1 teaspoon salt
    • 3 / 4 cup unsalted butter, room temperature
    • 1 3/4 cups granulated sugar
    • 4 eggs, room temperature
    • 3 / 4 cup milk, room temperature
  • Peanut Butter Buttercream
    • 1 1/2 cups creamy peanut butter
    • 1 cup unsalted butter (soft, but slightly cooler than room temperature)
    • 6 cups powdered sugar
    • 1 / 2 cup heavy cream
  • Chocolate Ganache
    • 1 1/2 cups semi-sweet chocolate chips
    • 3 / 4 cups heavy cream
  • For Decorating
    • 1 / 4 cup mini chocolate chips
    • mini peanut butter cups

Preparation

Chocolate Peanut Butter Cup Cake

Preheat oven to 350 degrees. Trace and cut out parchment paper to line the bottoms of two 8 – inch cake pans. Set aside.

In a stand mixer or a large mixing bowl, cream butter for 2 minutes until light in color and fluffy. Add granulated sugar and mix for approximately 3-4 minutes or until creamy. Add in eggs, one at a time, incorporating after each addition. Set aside.

In a medium mixing bowl, whisk together cake flour, cocoa powder, baking powder and salt.

Starting with your dry ingredient mixture, begin alternating additions of dry ingredients and milk to the large mixing bowl. You should begin by adding 1/3 of your dry ingredient mixture and follow by adding 1/2 of your milk. Repeat these additions, mixing after each until just incorporated. Avoid over mixing.

Divide the cake batter equally between each of your cake pans. Place in the oven and bake for 25-35 minutes (a dark cake pan will requirer the shorter cook time while a lighter colored cake pan will require the longer cook time) or until an inserted toothpick comes out clean.

Remove the cakes from the cake pans and place on a wire rack to let cool completely.

Peanut Butter Buttercream

In a large mixing bowl, use a mixer to beat butter until light and fluffy. Add in peanut butter and beat again until fully incorporated. Slowly begin to add in your powdered sugar, adding approximately one cup at a time. Begin adding in your heavy cream when the buttercream becomes too thick to beat and continue to mix until the buttercream is fully combined.

Chocolate Ganache

To a small bowl, pour your chocolate chips. Heat your heavy cream on the stovetop or in the microwave until hot and steaming. Avoid bringing the heavy cream to a boil. Pour the heavy cream over the top of the chocolate chips in the bowl. Let this sit for 4-5 minutes, then starting from the center of the bowl, begin stirring together the mixture. The chocolate chips should melt and form a smooth chocolate ganache. Set this aside for assembly.

Cake Assembly

Once your cakes have completely cooled, use a large knife to level off the tops. This will create an flat layer that will make stacking and assembly easier.

To a cake stand or large plate, spread a thin layer of buttercream frosting.

Place one of the cake layers onto the stand. Spread an even layer of buttercream frosting about 1/2 inch thick. This should use approximately 1 cup of your peanut buttercream.

Use about 1/2 cup of chocolate ganache and spread another even layer across the entire layer of peanut buttercream.

Place your other cake layer on top, flipping this cake layer upside down so that the top of your cake has a flat bottom. Press down gently.

Cover the entire cake with a thin layer of buttercream frosting. Smooth out the sides. This will be your crumb coat. Chill the cake for at least 20 minutes before using additional buttercream to completely cover and frost the cake.

Use the remainder of the chocolate ganache to spread an even layer oven the top of the cake. Optional: Use a spoon to create drips down the side of the cake with the chocolate ganache.

Top the cake with mini peanut butter cups, mini chocolate chips, and swirls of peanut buttercream. See picture for reference.

Let the chocolate completely set before slicing. This cake should serve approximately 12 people and is best consumed the day it is made. Store remaining leftovers in an airtight container. Enjoy!

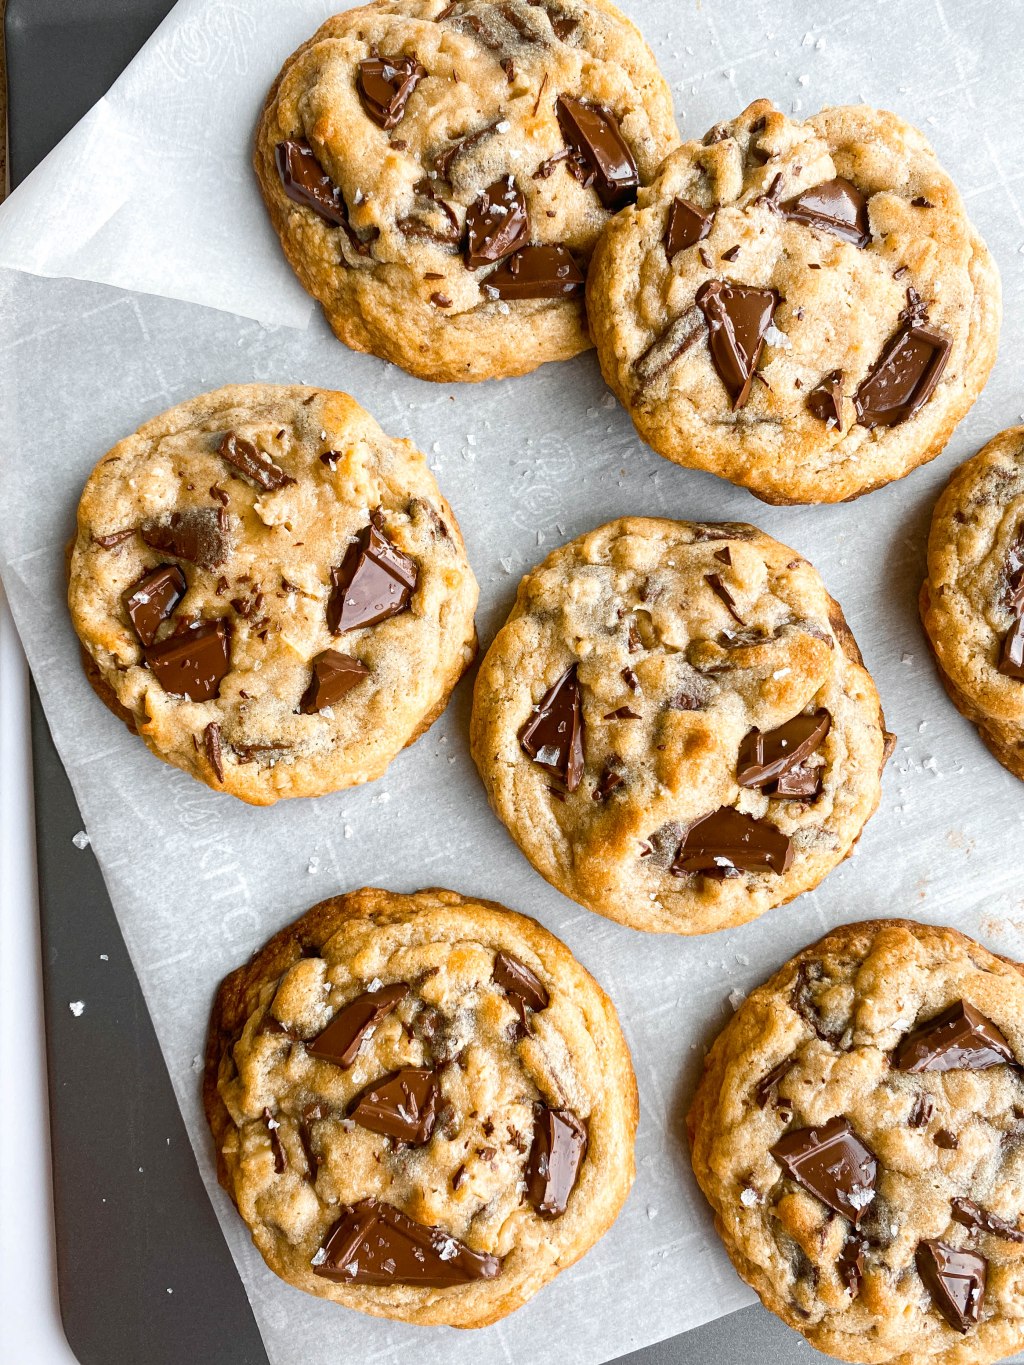
Dark Chocolate Chunk Oatmeal Cookies with Flakey Sea Salt

Serves 10 Large or 20 Regular Sized Cookies

Total Time 1 hour 30 Minutes

Ingredients

  • 1 cup unsalted butter, room temperature
  • 1 cup light brown sugar, packed
  • 1 / 2 cup granulated sugar
  • 2 eggs
  • 1 teaspoon vanilla extract
  • 2 1/2 cups all-purpose flour
  • 1 cup oats (rolled for a chewier texture or quick-oats for a softer texture)
  • 1 teaspoon baking soda
  • 1 teaspoon salt
  • 2 cups dark chocolate chunks, divided

Preparation

Preheat oven to 375 degrees Fahrenheit. Line two large baking sheets with parchment paper. Set aside.

In a stand mixer or large mixing bowl, cream together butter, brown sugar and granulated sugar (approximately 3-4 minutes or until creamy). Add in the eggs one at a time, mixing to incorporate after each addition. Add in vanilla extract and mix. Set aside bowl.

In a medium mixing bowl, whisk together all-purpose flour, oats, baking soda and salt. Add this dry ingredient mixture to your large mixing bowl. Stir to combine. It should come together as a thick dough. Pour in 1 1/2 cups of the chocolate chunks (reserving remaining 1 / 2 cup for later) and combine.

Cover the dough and place into the refrigerator to chill for at least 1 hour. Do not skip this step. Not properly chilling the dough will result in over spreading and oily cookies.

Use a 1 / 2 cup measuring cup to portion and form dough into 10 large dough portions. If you prefer regular sized cookies, use a 1 / 4 cup measuring cup and form 20 dough portions. Place dough onto your parchment lined baking sheets, leaving at least 2 inches in between each cookie.

Bake cookies 9-10 minutes for large sized cookies or 8-9 minutes for regular sized cookies. A lighter colored baking sheet will likely require the longer bake time while a darker colored baking sheet will likely require the shorter bake time. Remove from the oven when the bottoms appear golden brown and the middle appears soft.

Use remaining 1 / 2 cup of dark chocolate chunks to press into the cookies while they are still warm. Let the cookies cool and completely set up on the baking sheet for at least 10 minutes. Finish by sprinkling flakey sea salt over the cookies.

Store in a closed container for up to three days. Enjoy!

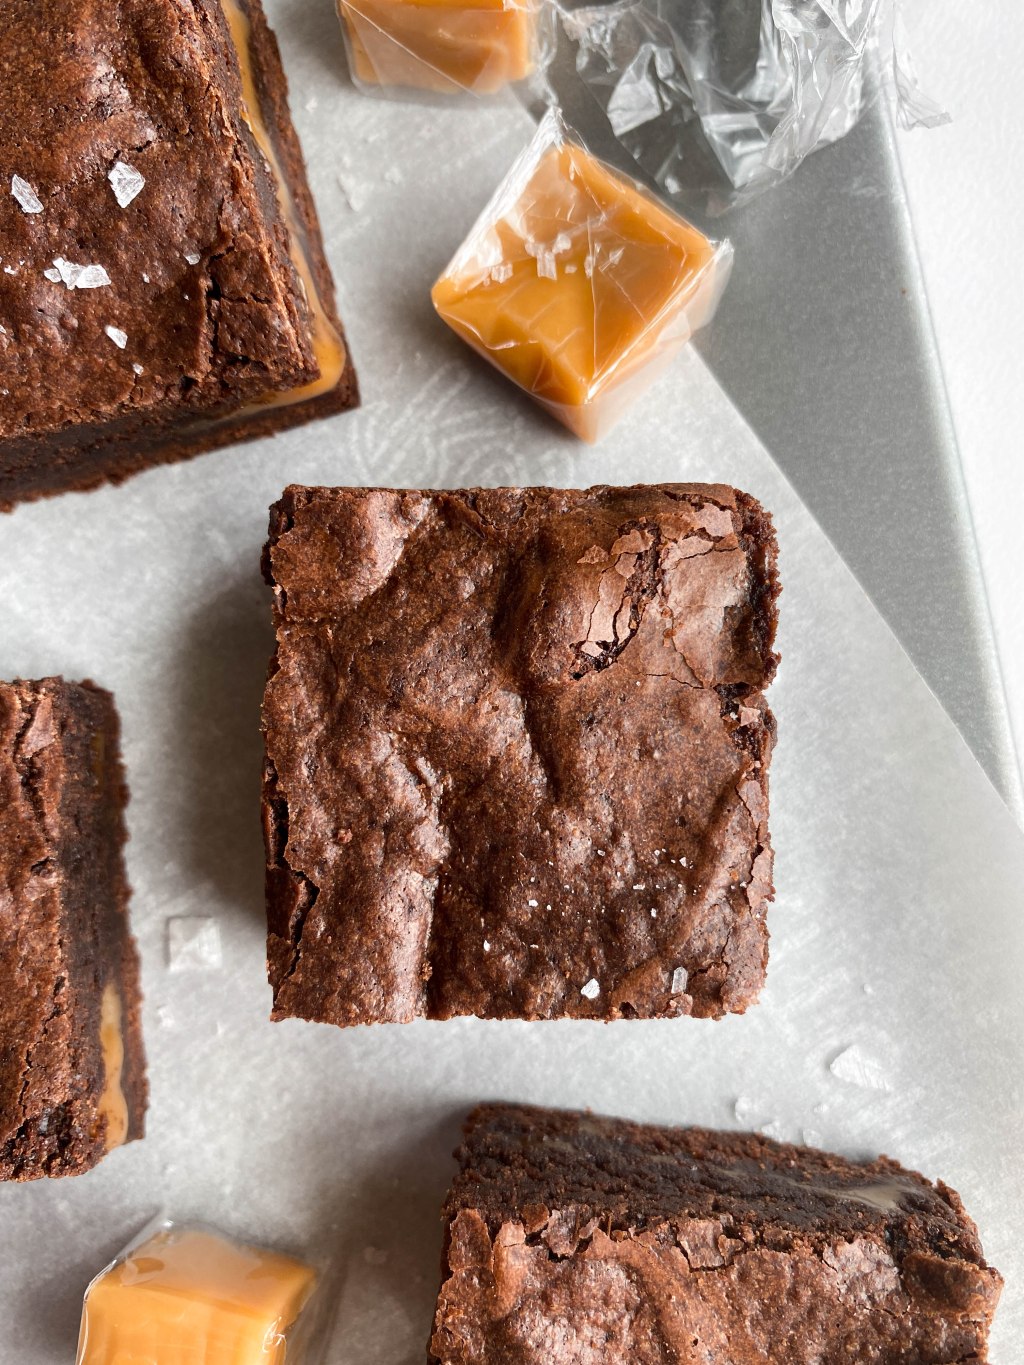
Salted Caramel Filled Fudge Brownies

Serves 9 Large or 16 Small Brownies

Total Time Less Than One Hour

Ingredients

  • Brownies
    • 1 / 2 cup all-purpose flour
    • 1 / 4 cup cocoa powder (preferably Dutch-processed)
    • 1 teaspoon cornstarch
    • 1 / 2 teaspoon salt
    • 6 tablespoons unsalted butter
    • 3 / 4 cup semi-sweet chocolate chips
    • 3 / 4 cup granulated sugar
    • 2 eggs, room temperature
    • 1 teaspoon vanilla extract
  • Caramel Filling
    • 20 unwrapped square caramels (155 grams or approximately 3 / 4 cup)
    • 1 / 4 cup heavy cream
    • pinch of salt

Preparation

Caramel Filling

In a small saucepan over medium heat, begin to melt the unwrapped caramel candies. Heat for approximately 2 minutes, stirring constantly and scraping the bottom and sides of the pan as needed. The candies will likely clump together.

After 2 minutes, pour the heavy cream into your saucepan. Continue stirring until the caramels melt completely and the mixture is smooth. Remove from heat. Add in a large pinch of salt and set aside. You should have approximately 1 cup of caramel filling.

Brownies

Preheat your oven to 350 degrees Fahrenheit and line an 8 x 8 square baking pan with parchment paper.

In a small mixing bowl, whisk together flour, cocoa powder, cornstarch, and salt. Set aside.

In a small sauce pan, melt your butter and chocolate chips over medium heat. Once melted, immediately remove from heat and pour in your granulated sugar. Stir to combine.

Transfer your mixture to a medium sized mixing bowl. Add in the eggs one at a time, stirring to combine after each addition. Add in the vanilla extract and stir.

Add your dry ingredient mixture to your batter. Stir to combine.

To your lined baking pan, pour in half of your brownie batter. Make sure the batter spreads out across the entire pan, reaching into the corners as well. On top of the brownie batter, pour a layer of the caramel filling. Spread it out to the corners of the pan, being careful to avoid mixing the caramel into the brownie layer. Add the remaining half of your brownie batter on top of the caramel filling. Spread to the corners of the pan so that no caramel is showing.

Place in the oven and bake for 30-35 minutes. Let cool completely before slicing and serving.

Optional: Before serving, top the brownies with flakey sea salt.

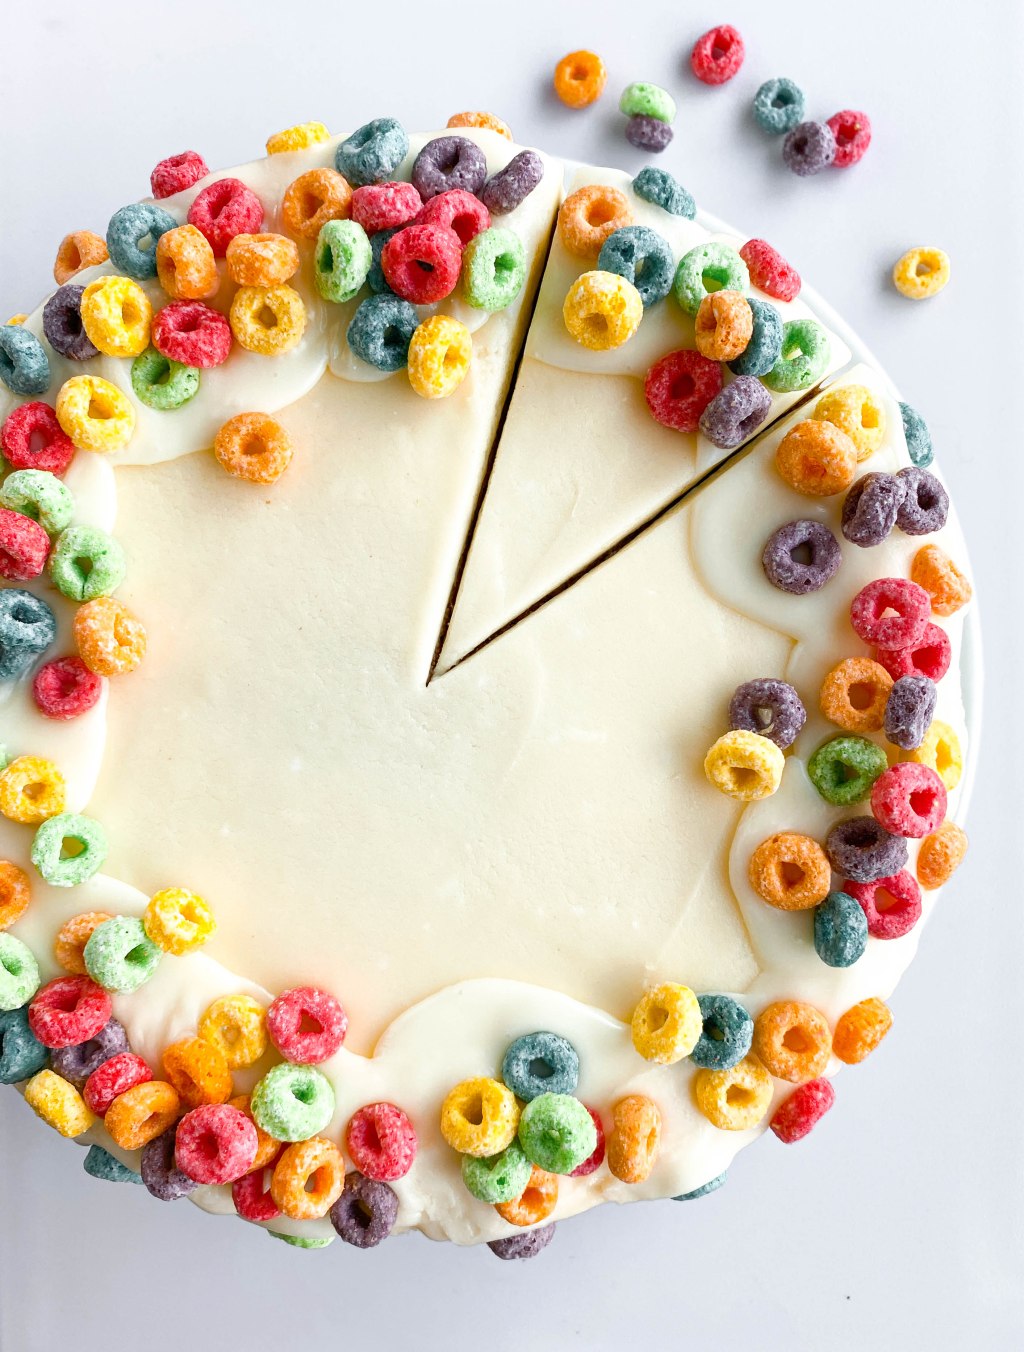
Fruity Cereal ‘N Milk Layered Cake

Serves 12 Slices (Approximately)

Total Time 2 Hours

Ingredients

  • Cereal Milk
    • 2 cups milk
    • 2 cups fruity cereal (preferably froot loops)
  • Fruity Cereal ‘N Milk Cake
    • 2 1/2 cups cake flour
    • 2 teaspoons baking powder
    • 1 / 2 teaspoon salt
    • 3 / 4 cup unsalted butter, room temperature
    • 1 1/2 cups granulated sugar
    • 4 eggs, room temperature
    • 2 teaspoons vanilla extract
    • 3 / 4 cup cereal milk, room temperature
    • 1 1/2 cup fruity cereal (preferably froot loops)
  • Cereal Milk Buttercream
    • 2 1/4 cups unsalted butter (soft, but slightly cooler than room temperature)
    • 6 cups powdered sugar
    • 1 1/2 teaspoons vanilla extract
    • 1 / 4 cup cereal milk (plus additional to thin as needed)
    • pinch of salt
  • For Decorating
    • 3/4 cup white chocolate (chips or almond bark)
    • 2 tablespoons milk
    • Additional fruity cereal

Preparation

Cereal Milk

To make the cereal milk, add your milk and fruity cereal to a bowl. Use a spoon and mix together, completely covering the cereal with the milk. Let this sit for 15 minutes. Note: Letting this mixture sit for longer will result in you not having enough milk for the cake because the cereal will absorb too much of the milk.

Strain this mixture and set aside your milk to use as directed in the recipe.

Fruity Cereal ‘N Milk Cake

Preheat oven to 350 degrees. Trace and cut out parchment paper to line the bottoms of two 8 – inch cake pans. Set aside.

In a large mixing bowl, use a mixer to cream butter for 2 minutes until light in color and fluffy. Add granulated sugar and mix for approximately 3-4 minutes or until creamy. Add in eggs, one at a time, incorporating after each addition. Add in vanilla extract. Set aside.

In a medium mixing bowl, whisk together cake flour, baking powder and salt.

Starting with your dry ingredient mixture, begin alternating additions of dry ingredients and cereal milk to the large mixing bowl. You should begin by adding 1/3 of your dry ingredient mixture and follow by adding 1/2 of your milk. Repeat these additions, mixing after each until just incorporated. Avoid over mixing as this will result in a dry cake.

Add 1 1/2 cups of your fruity cereal to a high speed blender and pulse until the cereal is finely ground with no large pieces remaining (I found that large cereal pieces resulted in chewy pieces in the cake, so this step is important!) Carefully fold the cereal into your batter until just incorporated.

Divide the cake batter equally between each of your cake pans. Place in the oven and bake for 25-35 minutes (a dark cake pan will requirer the shorter cook time while a lighter colored cake pan will require the longer cook time) or until an inserted toothpick comes out clean.

Remove the cakes from the cake pans and place on a wire rack to let cool completely.

Cereal Milk Buttercream

In a stand mixer or large mixing bowl, beat butter until light and fluffy. Add in powdered sugar and mix to incorporate. Begin by adding in 1/4 cup of your cereal milk and vanilla extract and mix. If the buttercream appears to thick to spread, slowly add in additional cereal milk a tablespoon at a time.

Cake Assembly

Level each of the cakes using a serrated knife to create flat tops that will make stacking easier.

To a cake stand or large plate, spread a thin layer of buttercream frosting.

Place one of the cake layers onto the stand. Spread a layer of buttercream frosting about 1/2 inch thick.

Place your other cake layer on top, flipping this cake layer upside down so that the top of your cake has a flat bottom. Press down gently.

Cover the entire cake with a thin layer of buttercream frosting. Smooth out the sides. This will be your crumb coat. Chill the cake for at least 20 minutes before using the remaining buttercream to completely cover and frost the cake.

In a small microwavable bowl, combine white chocolate chips with milk. Microwave in 20 second intervals, stirring after each, until the chocolate is completely melted and smooth. The consistency of the chocolate should be pourable.

Use a spoon to create large puddles around the top of the cake (as shown in the photo) and some drips down the sides of the cake.

Before the chocolate hardens, press in your cereal around the edges (as shown in the photo).

Let the chocolate completely set before slicing. This cake should serve approximately 12 people and is best consumed the day it is made. Enjoy!

Note: The cereal topping on the cake will lose its crunch and soften with time. If you are not planning on eating the cake the day it is made, you should omit the cereal.

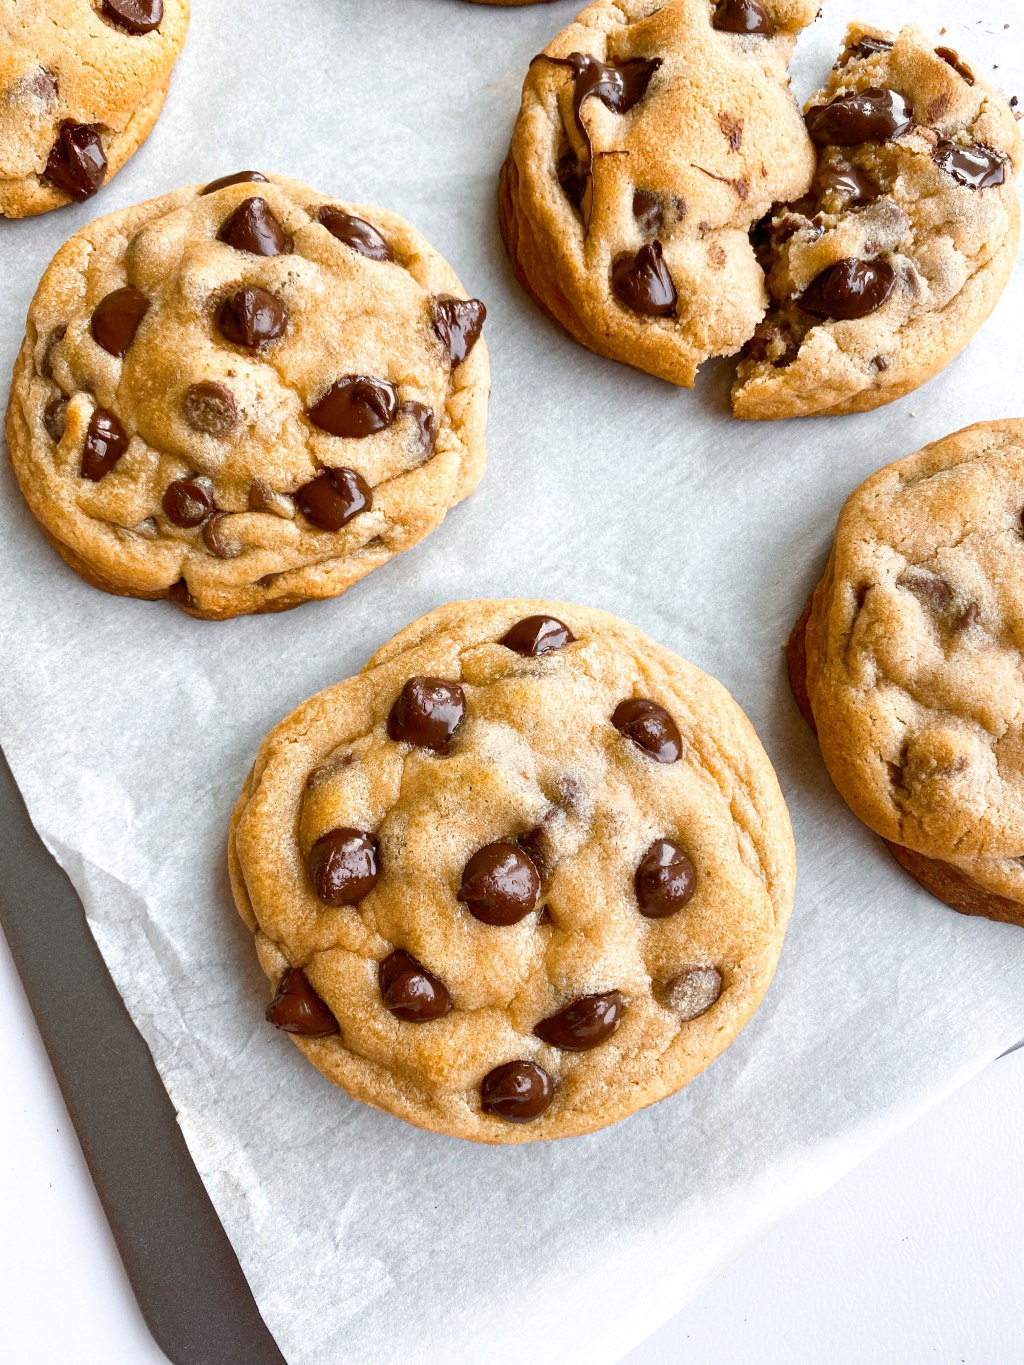
The Thickest and Gooiest Chocolate Chip Cookies

Serves 9 Large Cookies or 18 Regular Size Cookies

Total Time 1 Hour 30 Minutes

Ingredients

  • 1 cup unsalted butter, room temperature
  • 1 cup light brown sugar, packed
  • 1 / 2 cup granulated sugar
  • 2 eggs
  • 1 teaspoon vanilla extract
  • 3 cups all-purpose flour
  • 1 teaspoon baking soda
  • 1 teaspoon salt
  • 1 3/4 cups chocolate chips (*optional extra 1 / 4 cup to press into dough before baking)

Preparation

Preheat oven to 375 degrees Fahrenheit. Line two large baking sheets with parchment paper. Set aside.

In a stand mixer or large mixing bowl, cream butter, brown sugar and granulated sugar for approximately 3-4 minutes or until light and creamy. Add in the eggs one at a time, mixing to incorporate after each addition. Add in vanilla extract and mix. Set aside bowl.

In a medium mixing bowl, whisk together all-purpose flour, baking soda and salt. Add this dry ingredient mixture to your large mixing bowl and combine. It should come together as a thick dough. Add the chocolate chips and combine.

Place the dough into the refrigerator to chill for one hour. Do not skip this step. Not properly chilling the dough will result in over spreading and oily cookies.

Use a 1 / 2 cup measuring cup to form dough into 9 large dough portions. (If you prefer regular sized cookies, use a 1 / 4 cup measuring cup and form 18 dough portions. Place dough onto your parchment lined baking sheets, leaving at least 2 inches in between each cookie. Press additional chocolate chips into the tops of each dough portion if desired.

Bake for 10-12 minutes for large sized cookies or 9-11 minutes for regular sized cookies. A lighter colored baking sheet will likely require the longer bake time while a darker colored baking sheet will likely require the shorter bake time. Remove from the oven when the bottoms appear to be golden brown but the middle still appears soft. Let the cookies completely cool and set up on the baking sheet for at least 10 minutes.

Store in a closed container for up to three days. Enjoy!

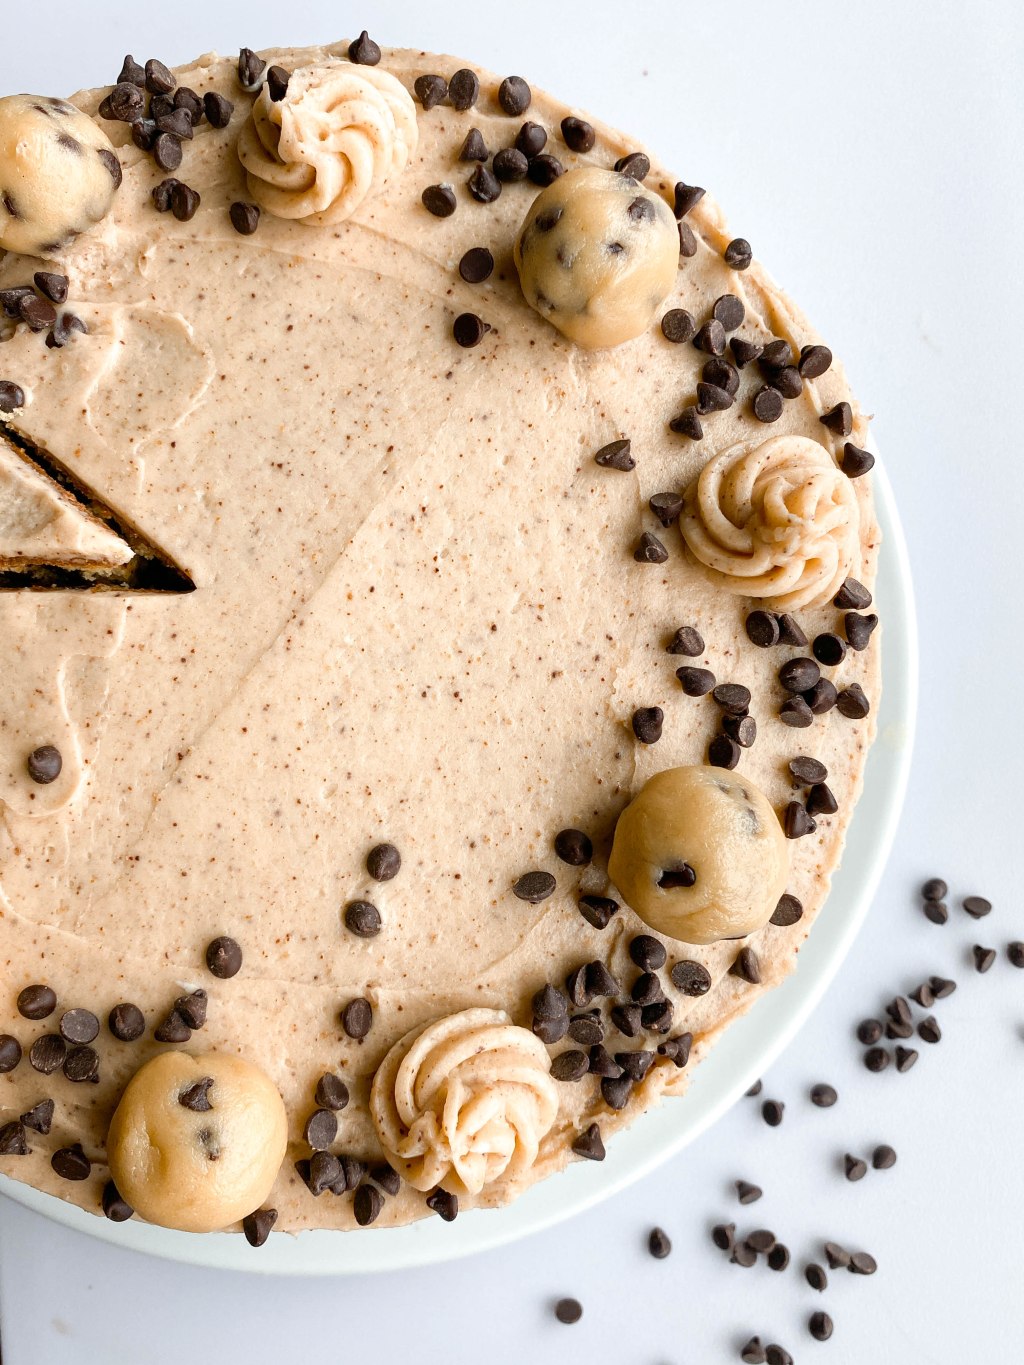
Chocolate Chip Cookie Dough Layered Cake

Serves 12 Slices (Approximately)

Total Time 2 Hours

Ingredients

  • Chocolate Chip Cake
    • 2 1/2 cups cake flour (substitute all-purpose flour)
    • 2 teaspoons baking powder
    • 1 / 2 teaspoon salt
    • 3 / 4 cup unsalted butter, room temperature
    • 1 cup light brown sugar, packed
    • 1 / 2 cup granulated sugar
    • 4 eggs, room temperature
    • 2 teaspoons vanilla extract
    • 3 / 4 cup milk, room temperature
    • 1 cup mini chocolate chips (tossed and coated with 1 teaspoon flour)
  • Chocolate Chip Cookie Dough Filling
    • 1 1/2 cup all-purpose flour
    • 1 / 2 teaspoon salt
    • 1 / 2 cup unsalted butter, room temperature
    • 1 / 2 cup light brown sugar, packed
    • 1 / 4 cup granulated sugar
    • 1 teaspoon vanilla
    • 1 / 4 cup milk
    • 1 / 2 cup mini chocolate chips
  • Chocolate Chip Cookie Buttercream
    • 1 1/2 cups unsalted butter (soft, but slightly cooler than room temperature)
    • 4 cups powdered sugar
    • 1 teaspoon vanilla extract
    • 1 cup crushed cookies, sifted (use cookies similar to original Chips Ahoy)
    • 1 / 4 cup heavy cream (substitute with milk)
    • pinch of salt
  • For Decorating
    • Mini chocolate chips

Preparation

Chocolate Chip Cake

Preheat oven to 350 degrees. Trace and cut out parchment paper to line the bottoms of two 8 – inch cake pans. Set aside.

In a stand mixer or large mixing bowl, cream butter with brown sugar and granulated sugar until light and creamy, approximately 3-4 minutes. Add in eggs, one at a time, incorporating after each addition. Add in vanilla extract. Set aside.

In a medium mixing bowl, whisk together cake flour, baking powder and salt.

Starting with your dry ingredient mixture, begin alternating additions of dry ingredients and milk to the large mixing bowl. You should begin by adding 1/3 of your dry ingredient mixture and follow by adding 1/2 of your milk. Repeat these additions, mixing after each until just incorporated. Avoid over mixing as this will result in a dry cake.

Toss and coat your mini chocolate chips with 1 teaspoon of flour. This will prevent the chocolate chips from sinking to the bottom of your cake while baking. Fold the chocolate chips into your batter.

Divide the cake batter equally between each of your cake pans. Place in the oven and bake for 25-35 minutes (a dark cake pan will likely require the shorter cook time while a lighter colored cake pan will require a longer cook time) or until an inserted toothpick comes out clean.

Remove the cakes from the cake pans and place on a wire rack to let cool completely.

Chocolate Chip Cookie Dough Filling

Spread flour on a baking sheet and place in the oven for 5 minutes at 350 degrees. This ensures that the raw flour will be safe to consume. Let cool completely before using.

In a stand mixer or medium-sized mixing bowl, cream butter with brown sugar and granulated sugar until light in color and creamy. Add in vanilla extract and mix again.

In a separate mixing bowl, whisk together your flour and salt. Add this dry ingredient mixture to your creamed butter/sugar and combine.

Pour in milk and combine. Fold in mini chocolate chips.

Line a third 8 – inch cake pan with plastic wrap or foil. Add 2 cups of the cookie dough filling to the pan. It should be thick, but as evenly as possible, spread the filling into a layer across the entire pan. Place this in the refrigerator to chill while you prepare the buttercream. With the remaining cookie dough filling, use your hands to roll the dough into six equal portions. These will be used to decorate the top of the cake.

Chocolate Chip Cookie Buttercream

Add your cookies to a high speed blender or food processor. Pulse cookies until no large pieces remain and there are only crumbs. Sift with a fine mesh strainer and measure 1 cup of cookie crumbs to use for the buttercream.

In a stand mixer or large mixing bowl, beat butter until light and fluffy, approximately 2 minutes. Slowly begin adding in the powdered sugar and continue mixing. Add in vanilla extract and a pinch of salt. Stream in half of the heavy cream.

Add the cookie crumbs to your buttercream and fold to incorporate. If the buttercream is too thick to spread, stream in the remaining half of the heavy cream.

Cake Assembly

Level each of the cakes with a serrated knife to create a flat top.

To a cake stand or large plate, spread a thin layer of buttercream frosting.

Place one of the cake layers onto the stand. Spread a thin layer of buttercream frosting. Remove your cookie dough filling layer from the refrigerator and place on top. Spread another thin layer of buttercream frosting.

Place your other cake layer on top, flipping this cake layer upside down so that the top of your cake has a flat bottom. Press down gently.

Cover the entire cake with a thin layer of buttercream frosting. Smooth out the sides. This will be your crumb coat. Chill the cake for 20 minutes before using the remaining buttercream to completely cover and frost the cake.

Around the bottom of the cake, gently add mini chocolate chips. Add a ring of chocolate chips to the top of the cake (as shown in picture). Place the cookie dough portions that you formed earlier around the top. If you have remaining buttercream, add to a pastry bag and pipe designs in remaining spaces.

This cake should serve approximately 12 people and is best consumed the day it is made. If leftovers remain, store in an airtight container. Enjoy!